Configuring environment
Any project that is developed in ROS 2, is typically called a “package”. And all these packages are stored under a ROS workspace. See below, the folders structure that is followed when working with ROS 2.
ROS_workspace_folder/
   src/
      cpp_package_1/
         CMakeLists.txt
         include/cpp_package_1/
         package.xml
         src/

      py_package_1/
         package.xml
         resource/py_package_1
         setup.cfg
         setup.py
         py_package_1/
      ...
      cpp_package_n/
         CMakeLists.txt
         include/cpp_package_n/
         package.xml
         src/
When initiating a Docker container from the ros2_humble_image Docker image that was generated in the previous section of the course, the folder called ros2_ws refers to the name of the ROS 2 workspace that is going to be used during the course.
Below, it will be seen how to properly configure it as a workspace.
Creating and configuring the workspace
Open a Windows terminal, navigate to one folder above the directory where the folder to contain all the course progress is stored (the ros2_ws folder in this case) and execute:
docker run --name ros2_container -e DISPLAY=host.docker.internal:0.0 -v $pwd/ros2_ws/:/ros2_ws -it ros2_humble_image
This command is mouniting a volume into the generated container. Inside the container, execute:
ls
cd ros2_ws
ls
See that the folder, at this point only contains a HelloWorld.txt file because of the linking of this folder with git; Recall this previous section.

Inside this workspace folder create a src folder. In the ros2_ws/src directory, run the following command:
git clone https://github.com/ros/ros_tutorials.git -b humble
This command is clonning a github repository called: ros_tutorials. This repository consists on various packages, among them, the turtlesim package, which will be the only one to be built for this example; See that the other packages in this repository contain a COLCON_IGNORE file.
This is the current structure of the workspace. Notice that it does not exactly match the one shown above, but since the other packages (ros_tutorials, roscpp_tutorials and rospy_tutorials) are not going to be built, then it is like having only the turtlesim package, which makes it more resemble the workspace folders structure shown above.
ROS_workspace_folder/
   src/
      ros_tutorials/

         ros_tutorials/
            ...
            COLCON_IGNORE

         roscpp_tutorials/
            ...
            COLCON_IGNORE

         rospy_tutorials/
            ...
            COLCON_IGNORE

         turtlesim/
            CHANGELOG.rst
            CMakeLists.txt
            action/
            images/
            include/
            launch/
            msg/
            package.xml
            src/
            srv/
            tutorials/
At this point, the workspace has been populated with a sample package, but it is not a fully-functional workspace yet.
Building the packages in the workspace
Next, to make a workspace fully functional, meaning that one could be able to run executables that belong to a specific package, it is necessary to build the workspace. Building the workspace involves discovering packages, resolving dependencies, compiling code and generating build artifacts.
To achieve building a workspace, the following three commands will be described. Navigate to the ros2_ws folder and execute either of these:
colcon build

colcon build --symlink-install

colcon build --packages-select turtlesim
The first command will build all the packages contained in the workspace; it will build them by copying the built artifacts (binaries, libraries, headers, etc.) into an install directory. While the second one, will also build all the packages contained in the workspace, but rather than copying the built artifacts, it will use symbolic links to these ones. The way the built artifacts are handled results in having to build the workspace every time a change is performed in the source code, or not. With colcon build --symlink-install, every time a change is performed in the source code, it will not be necessary to perform the building operation afterwards.
Finally, the third colcon command specifically builds the given package rather than all packages contained in the workspace.
After execution of either of the above-shown commands, the result will be similar to:
Starting >>> turtlesim
[Processing: turtlesim]
[Processing: turtlesim]
Finished <<< turtlesim [1min 20s]

Summary: 1 package finished [1min 21s]
Now execute ls and see the new folders that were generated as a result of building the workspace.
build install log
At this point, the workspace is created and successfully built.
Workspace sourcing
It is important to define two concepts: “underlay” and “overlay”. These refer to different workspaces that contain ROS packages and are used to build and run ROS-based applications.
Underlay: The underlay workspace typically contains the core ROS packages and libraries, such as those provided by ROS distributions. It serves as the foundation for a ROS environment and provides the fundamental functionality and dependencies required for ROS to work.
Overlay: An overlay workspace, on the other hand, contains additional ROS packages that were created or obtained from external sources. These packages extend the functionality of the ROS system beyond what’s provided by the underlay workspace. To develop own ROS nodes, integrate third-party packages, or customize existing ROS packages overlay workspaces might be used.
Now, in order to set up the ROS 2 environment variables and its core functionalities it must be sourced the underlay ROS 2 workspace. This is achieved by executing:
source /opt/ros/humble/setup.bash
This command should be executed inside a Docker container terminal. Each time a new terminal is open, it would be necessary to setup the ROS 2 environment by executing the above command.
In general, it’s good practice to add the sourcing of the setup file to the .bashrc to ensure that the ROS 2 environment is always properly set up whenever a new terminal session is open. This is exactly what has been done in the ros2_humble_image Docker image. Execute the following command in the Docker container terminal:
nano ~/.bashrc
Navigate to the end of the file with the keyboard arrows and check to find something similar to this:

Until now, it can be seen that the Docker container generated from ros2_humble_image Docker image, is correctly configured to source the underlay ROS 2 workspace. Next, it is time to see how the overlay workspace works.
Open a new terminal and execute either of these commands:
source install/local_setup.bash
source install/setup.bash
Sourcing the local_setup of the overlay will only add the packages available in the overlay workspace to the current ROS 2 environment.
On the other hand, setup will source the overlay as well as the underlay it was created in, allowing to utilize both workspaces but, the overlay takes precedence over the contents of the underlay.
Now, the turtlesim package from the overlay workspace can be executed:
ros2 run turtlesim turtlesim_node
This will open an Xlaunch window with a turtle in it, like this:

Now, it is important to mention that the turtlesim package also comes with the ROS 2 main installation, then how to tell which package is being executed? the one from the main installation (underlay workspace) or the one from the package that was just cloned into the workspace (overlay)? To answer this question, some modifications will be done in the ros2_ws/src/ros_tutorials/turtlesim package.
Locate the turtle_frame.cpp file in <path_to_ws_folder>/ros2_ws/src/ros_tutorials/turtlesim/src. Open turtle_frame.cpp with the preferred text editor (for this course, the suggested text editor is VScode).
On line 52 find the function setWindowTitle("TurtleSim"), change it to be setWindowTitle("ROS2_course_TurtleSim"), and save the file.
Return to the terminal where the ros2 run turtlesim turtlesim_node command was executed, stop it by pressing Ctrl+C, and build the package again with:
colcon build
Source the overlay by executing:
source install/setup.bash
And run the turtlesim node again with:
ros2 run turtlesim turtlesim_node
An Xlaunch window should be opened with a turtle in it and the modified frame name to ROS2_course_TurtleSim.
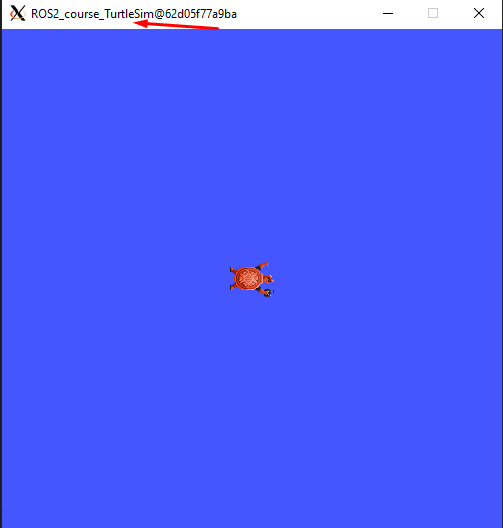
To see that your underlay is still intact, open a new terminal and run turtlesim again:
ros2 run turtlesim turtlesim_node
The result should be a new Xlaunch window with a different frame name, the TurtleSim name; having in total two Xlaunch windows. See picture below.

Creating and configuring a package
Packages are the basic unit of software organization within ROS 2 architecture. These are directories containing software libraries, executables, scripts, configuration files, and other resources that provide specific functionality.
In ROS 2, packages can be created with either CMake or Python, which are officially supported, though other build types do exist.
When building a package with CMake, the minimum required contents are:
my_package/
   CMakeLists.txt
   include/my_package/
   package.xml
   src/
Where:
CMakeLists.txtfile specifies the build instructions for the package, including compiler options, dependencies, targets to build, and installation rules.include/<package_name>directory contains the header files (.hpp) for the C++ classes and libraries provided by the package. Header files define the interfaces and APIs exposed by the package, allowing other packages to use its functionality.package.xmlprovides metadata and information about the package.srcdirectory containing the source code for the package.
When building a package with Python, the minimum required contents are:
my_package/
   package.xml
   resource/my_package
   setup.cfg
   setup.py
   my_package/
Where:
package.xml. Same as in the CMake-built package, it provides metadata and information about the package.resource/my_packagedirectory typically contains additional resources or data files that are needed by the Python package.These resources might include configuration files, launch files, images, meshes, or any other files required by your package at runtime.setup.cfgfile is a configuration file for setuptools, a library used to package Python projects. It contains various configuration options for how your Python package should be built, installed, and distributed.setup.pysetup script for the Python package, responsible for configuring the package build, installation, and distribution process. It typically imports setuptools and calls its setup function with various arguments to define the package metadata and behavior.my_package/directory contains the Python source code (.py) files for the package.
Create a package with python
Now, the structure to create a new package with python is the following:
ros2 pkg create --build-type ament_python --license Apache-2.0 <package_name>
To see an example of this, open a brand a new terminal in a Docker container, and make sure no other ROS command is currently running. Navigate to ros2_ws/src and execute:
ros2 pkg create --build-type ament_python --license Apache-2.0 --node-name my_node my_package
Notice that, here, the --node-name my_node is new to the package creation structure that was shown above. This indicates to generate an executable node (my_node) inside the pacakge of name my_package.
As a result, in the terminal it will be displayed some information about the package creation.
going to create a new package
package name: my_package
destination directory: /ros2_ws/src
package format: 3
version: 0.0.0
description: TODO: Package description
maintainer: ['root <root@todo.todo>']
licenses: ['Apache-2.0']
build type: ament_python
dependencies: []
node_name: my_node
creating folder ./my_package
creating ./my_package/package.xml
creating source folder
creating folder ./my_package/my_package
creating ./my_package/setup.py
creating ./my_package/setup.cfg
creating folder ./my_package/resource
creating ./my_package/resource/my_package
creating ./my_package/my_package/__init__.py
creating folder ./my_package/test
creating ./my_package/test/test_copyright.py
creating ./my_package/test/test_flake8.py
creating ./my_package/test/test_pep257.py
creating ./my_package/my_package/my_node.py
Next, build the package by navigating to the ros2_ws workspace and executingw either of these commands:
colcon build
colcon build --packages-select my_package
The second colcon build command builds only the specified package while the first one builds all the packages that are in the workspace.
Source the workspace:
source install/setup.bash
And run the executable that was created using the --node-name <argument> during package creation. Type this command:
ros2 run my_package my_node
This should be the result in the terminal:
Hi from my_package.
Create a package with CMake
The structure to create a new package with CMake is the following:
ros2 pkg create --build-type ament_cmake --license Apache-2.0 <package_name>
To see an example of this, open a brand a new terminal in a Docker container, and make sure no other ROS command is currently running. Navigate to ros2_ws/src and execute:
ros2 pkg create --build-type ament_cmake --license Apache-2.0 --node-name my_node my_package_cpp
As a result, in the terminal it will be displayed some information about the package creation.
going to create a new package
package name: my_package_cpp
destination directory: /ros2_ws/src
package format: 3
version: 0.0.0
description: TODO: Package description
maintainer: ['root <root@todo.todo>']
licenses: ['Apache-2.0']
build type: ament_cmake
dependencies: []
node_name: my_node
creating folder ./my_package_cpp
creating ./my_package_cpp/package.xml
creating source and include folder
creating folder ./my_package_cpp/src
creating folder ./my_package_cpp/include/my_package_cpp
creating ./my_package_cpp/CMakeLists.txt
creating ./my_package_cpp/src/my_node.cpp
Next, build the package by navigating to the ros2_ws workspace and executing either of these commands:
colcon build
colcon build --packages-select my_package_cpp
Source the workspace:
source install/setup.bash
And run the executable that was created using the --node-name <argument> during package creation, enter the command:
ros2 run my_package_cpp my_node
This should be the result in the terminal:
hello world my_package_cpp package
The Dockerfile script explained
A Dockerfile is a script containing a series of instructions on how to build a Docker image. It automates the process of creating a Docker image, which is a lightweight, standalone, and executable package that includes everything needed to run a piece of software, such as the code, runtime, libraries, and environment variables.
Recall this script, which is part of the Dockerfile commented in this part of the course.
FROM osrf/ros:humble-desktop

RUN apt-get update && apt-get install -y nano && apt-get install tree
RUN apt install -y python3-pip
RUN apt-get install dos2unix
RUN pip3 install setuptools==58.2.0
RUN echo "source /opt/ros/humble/setup.bash" >> ~/.bashrc
This considers a base Docker image, osrf/ros:humble-desktop in this case, and runs a series of commands within the Docker container during the image build process:
RUN apt-get update && apt-get install -y nano && apt-get install tree: Updates the package lists, installsnanotext editor andtreedirectory listing tool.RUN apt install -y python3-pip: Installs the Python 3 package manager,pip, within the Docker container.
Now, the following command is not critically necessary for the Docker container of this course. Only, that it was seen that for correctly generating python executables with chmode +x command this utility was needed:
RUN apt-get install dos2unix: Installs thedos2unixutility, which is used for converting text files between Unix and DOS formats. This is not a critically necessary utility
The below command, was seen to be necessary to overcome some warning messages at the moment of building packages in ROS:
RUN pip3 install setuptools==58.2.0: Usespip3to install a specific version of thesetuptoolsPython package (58.2.0) within the Docker container.
Finally, this command was indeed necessary to prevent to be souring the setup script every time a new terminal is open.
RUN echo "source /opt/ros/humble/setup.bash" >> ~/.bashrc: Appends the commandsource /opt/ros/humble/setup.bashto thebashrcfile in the user’s home directory (~). This ensures that the ROS 2 environment setup script is sourced automatically whenever a new shell session is started within the Docker container.